
If you’re managing email across multiple teams, departments, or locations, you’ve probably felt the tension between trying to send timely messages and keeping everything on-brand. These struggles lead to subscribers who just joined your list get the same message as someone who’s been quiet for months, and high-value moments like a form submission, a milestone date, or a behavior pattern pass by without a well-timed or personalized follow-up.
Understanding how email automation workflows operate can help you change that. Instead of relying on manual sends, you build the sequence once and let subscriber behaviors trigger them. The right message goes out at the right time, automatically. Every send is consistent with your brand, no matter how many people or locations are involved.
What are email automation workflows?
An email automation workflow is a sequence of emails that fires automatically when a subscriber performs an action or reaches a specific date or life cycle stage. Instead of deciding each day who needs what communication and drafting it from scratch, you set up the logic once, create your email templates, and let it run, tweaking as needed.
Every automated email workflow has three parts:
- The trigger: An event that starts the sequence. Examples include a form submission, a clicking a link, reaching a date in the subscriber’s record like an anniversary, or a change to their contact data.
- The wait step: A subscriber is given time to act before the next email arrives, and to avoid overcrowding their inbox.
- The action: This is the email itself, sent automatically to everyone who meets the trigger criteria.
Timing is what makes these workflows so effective. An email that arrives after someone signs up, or goes quiet, reaches them when it actually matters, and no one on your team has to remember to send it.
Email automation workflows every team should use
These five workflows cover opportunities for easy automations that can make email sending simpler for you and your team.
Welcome series
Use the first email to introduce your brand, set expectations for what’s coming, and invite a first action, like reading relevant content or signing up for an upcoming webinar. A new donor, a prospective student, or a new team member benefits from an automated welcome series that makes a strong first impression while their attention is at its peak.
Lead nurturing and onboarding
The goal of the first email in the nurture or onboarding process is to make the person feel set up for success. Triggered by a form fill, trial start, or demo request, this sequence moves a lead or new user from curiosity to confidence by answering questions or removing barriers, guiding them toward the next step in your organization’s process.
Re-engagement
Leaving inactive subscribers on your list too long can affect how inbox providers view your sends overall, affecting your message’s ability to reach the right inbox. Re-engaging inactive subscribers goes beyond a mass email attempt to win a few contacts back, and should include some reason as to why they should reengage with you. If they don’t become active again, removing them from the list is the next step, because keeping that list trimmed means the rest of your emails keep landing where they should.
Date-based and milestone emails
Triggered by a stored date in the subscriber’s record, like a birthday, membership anniversary, enrollment, or renewal date, these emails feel personal and timely without needing manual effort. Your subscribers notice when they’re treated as individuals, and it shows people you’re paying attention to them.
Abandoned registration
Triggered when someone starts filling out an event registration, a webinar sign-up, or a volunteer application but doesn’t finish, this workflow sends a brief, helpful follow-up. Think of it as a friendly nudge that they started something worth completing.
5 email workflow best practices
Getting your workflows built is the first step, but running them well over time is what makes them count.
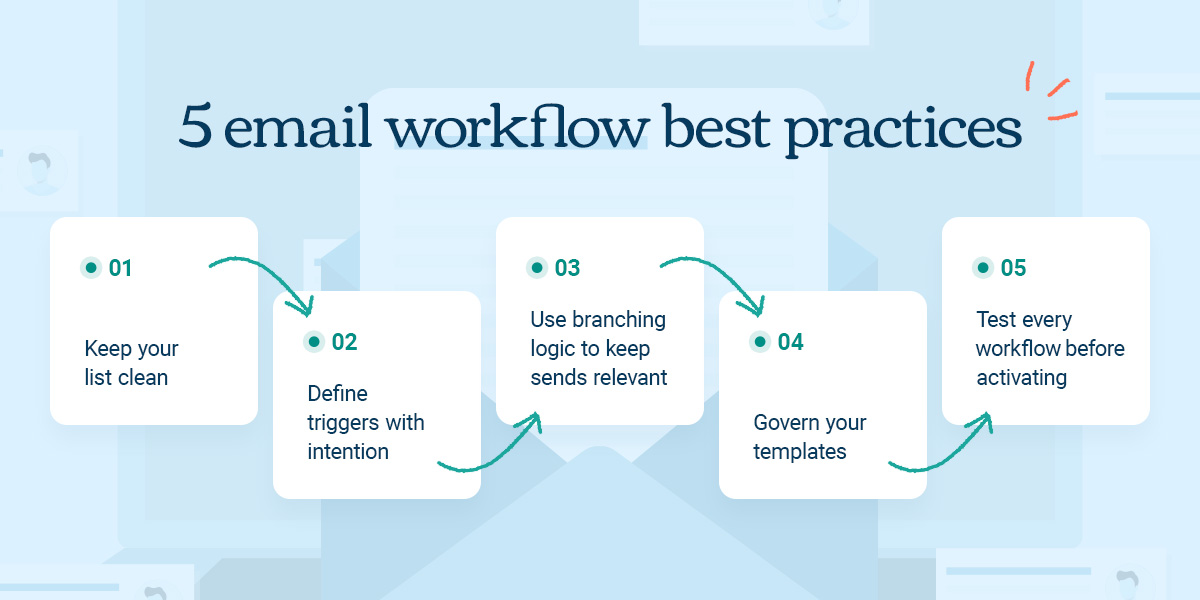
1. Keep your list clean
Sending to inactive subscribers can affect inbox placement for the rest of your list, including the engaged contacts who actually want your emails. If someone hasn’t engaged in the past six months, it’s worth asking whether they should still be on your active subscribers list. Removing them keeps your metrics more accurate and your deliverability healthy.
Email list hygiene also supports compliance with laws and privacy frameworks like the CAN-SPAM Act, the General Data Protection Regulation (GDPR), and the California Consumer Privacy Act (CCPA). These requirements govern consent, opt-outs, privacy rights, and required notices. Staying on top of both means you’re respecting subscriber preferences and protecting your deliverability at the same time.
2. Define triggers with intention
Every trigger should answer two questions before it fires. “What subscriber behavior or data point starts this?” and “What do I want them to do next?” If you can’t answer both clearly, the trigger isn’t ready. Deliberate triggers produce relevant sends, while loose ones produce sends that feel random, negatively impacting your subscribers and your metrics.
3. Use branching logic to keep sends relevant
Branching allows the workflow to send different emails based on how a subscriber responds, or doesn’t, to the previous step. Someone who clicked gets a follow-up that builds on their area of interest, while someone who didn’t click gets a more eye-catching subject line or more information in their next email. A two-branch structure is a simple starting point for your first build, with the goal of each subscriber getting something that applies to where they are in their customer journey.
4. Govern your templates
Template governance in email marketing involves setting rules and locking certain brand elements, like font, logo, and imagery, to ensure they are applied consistently across all outgoing emails. It’s especially helpful if your organization has multiple teams, departments, or locations sending emails to different audiences. When templates are locked and approved in the platform, senders have everything they need to build and run their own workflows without administration teams worrying about consistency.
5. Test every workflow before activating
A broken link or misfiring trigger in a singular email send is a one-time mistake that affects one campaign. In an active workflow, the same issue can reoccur with every subscriber who enters it, so it’s worth taking a few minutes to verify before you hit activate. Test with a sample contact, walk every branch path, and check that wait steps are configured correctly.
How to set up email automation workflows in 6 steps
Here’s how to build and launch a workflow, step by step.
Step 1: Plan it out first
Think about the workflow before you build it and define the following:
- Who is this workflow for?
- What action triggers them in?
- How many emails are in the sequence?
- What are the delays between steps?
- What does “done” look like? A click, a completed registration, a re-engagement?
Taking time to plan up front saves a lot of rework later, and it’s a lot more convenient to catch a gap on paper than halfway through a build.
Step 2: Create a new workflow
Name the new workflow something clear and recognizable. “New subscriber welcome – Nonprofits” is more useful than “Workflow 3.” Select the audience or segment this workflow applies to, which defines the pool of subscribers eligible to enter it.
Step 3: Set your trigger event
The trigger is the engine, and everything in the workflow moves in response to it. Common triggers might include a subscriber joining via a form or clicking a link in a previous email. Choose the trigger that matches the behavior or data point you’re responding to, or based on what actions you see most commonly from different audience segments.
Step 4: Add branches and wait steps
After setting the trigger event, build out the workflow so it’s relevant to each subscriber’s journey and previous action. Clicking on a Nonprofit case study should send someone down a different journey than someone who clicked a guide on finding the right email platform for higher education. Add wait steps between emails to not spam the recipient, and use branches where appropriate to split the path based on engagement.
Step 5: Apply brand controls
If you run email automation for distributed teams, brand controls are what make it scalable. Local teams can build and send their own campaigns, but locked-in template elements, restricted editing, and approval requirements ensure everything that goes out still meets standards. A tiered account structure gives headquarters the control it needs to maintain consistency without taking flexibility and personalization away from the teams doing the sending.
Step 6: Activate and monitor
If you’re using Emma as your email platform, switch the workflow from Inactive to Active when you’re ready, and test it before activating to make sure it runs correctly. After launch, check the built-in dashboard for an overview of your metrics. Look for what point subscribers start to drop off, and that’s where the workflow could use some optimizing. Set a quarterly reminder to review active workflows, update messaging, and confirm that triggers still work as expected.
Ready to put your automation to work with Emma?
Automation saves time, but the real value is consistency. Every triggered send reaches the right subscriber at the right moment without anyone needing to press send. Emma’s automation workflow tools let you build the sequences that matter, set the triggers that fit your strategy, and for organizations managing multiple senders or locations, lock in the brand controls that keep every automated send on-message. Explore Emma’s automation features today to learn more.